Garden bed update: 2 of the 3 beds are finished!

Looking at how things are shaping up, this was definitely a good idea for the back yard, but let’s back up in case you missed some of the backstory:

At the last update, I mentioned that the fence to the right of my house is my neighbor’s, and it’s simply just seen better days. I’m guessing, but most of the damage appears to be caused by the planting of bamboo directly next to the fence, so word to the wise: don’t ever do that. While I don’t really want the expense of replacing an entire length of fence that doesn’t belong to me, I did want to spruce it up a bit.
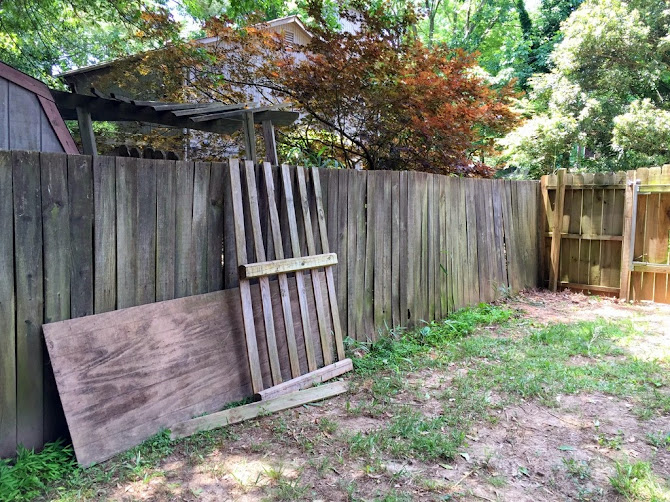
That, and I wanted to create something that might deter my pup Charlie from jumping it (she’s got a spot along the fence that she tries to jump whenever I’m not looking or in the house; it’s very annoying.). Garden beds seemed like a great option, especially since I was re-using some old materials that my sister had from her own fence project (some of which I used for my own fence, but still had plenty left over).
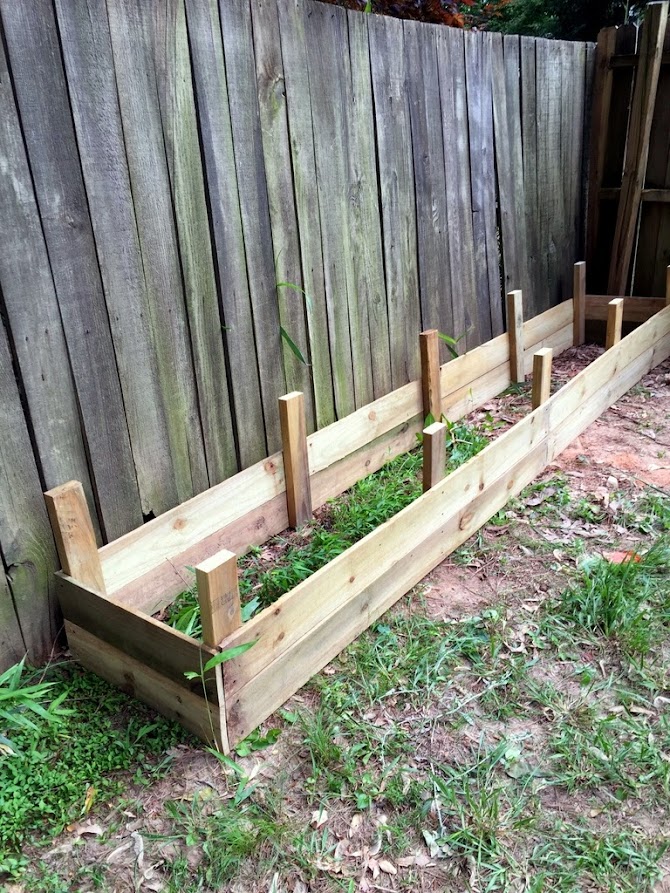
The fence boards were a bit warped from exposure, but it was still good enough to get the job done. Especially when it was completely free to nearly the end of the project! All I had to actually buy were the plants themselves, the top layer of soil, and a couple of bags of decorative mulch (the rest of the beds were filled in using the lasagna gardening technique, which meant that most of it was filled in with cardboard and leftover yard debris).

Gardenias are one of my favorite shrubs and grew in the back yard of the house I grew up in with relatively zero maintenance, so they seemed like the perfect fit for this spot (azaleas and hydrangeas would have been good choices as well, but hydrangeas aren’t evergreen and azaleas stay kind of squat and scraggly). They’re not only beautifully fragrant when they bloom, but this particular variety grows tall and wide, so I didn’t need many of them to fill in each bed.

It’s taken a while to fill in each bed with the huge pile of pine mulch created when I removed trees earlier this year, but I found that one of the easiest ways to get it done was just to try to fill a wheelbarrow whenever Charlie went outside (and it wasn’t too hot mid-afternoon or too dark).

Since each bed needed about 4-5 full wheelbarrows of material to fill in completely, that made for quite a few potty breaks.

I still have one more bed to fill, but it’s the shortest, so I should have no problem getting it done by the weekend.

Lowe’s carried only 6 of the total 9 gardenia shrubs I needed as of the last trip, so I’m still looking to fill in the final bed once the filler mulch goes in. The one on the end toward the gate is the most important Charlie-wise, so I picked that as my starting point and spread each plant about 3 feet apart. Hopefully once they grow in, they’ll make a nice-looking hedge.

Until it grows in though, I still have to find a temporary solution keep Charlie homebound. For now, I have part of an older pallet that I’ve propped into place on the end, but I do have a plan to DIY another solution soon. It may not be the classiest look right now, but it saves me a headache, so I’m happy!

More on that project when it’s done, but it feels good to be this far with my outdoor project goals for the summer. What have you been working on?
The post Gardenia Garden Beds appeared first on The Ugly Duckling House.
Website // Subscribe // Advertise // Twitter // Facebook // Google+


No comments:
Post a Comment