The floating shelves in the laundry room are now 100% done. And with these crossed off the list, I can finally start using them—which also means that I can finally make the cluttered floor of “Mount Washmore” a thing of the past and gain some extra storage.

Here’s the thing with these shelves: I’ve been contemplating them for a while. Because despite the many tutorials I’ve looked through, I’ve never been able to find the exact combination of features I was looking for. Specifically:

Long. Deep. Thin. Inexpensive. Secure. I spent a while looking, but I honestly had a hard time finding one that had all of these in one. My biggest issue was that most floating shelves require the frame of the shelving system to be rather thick if they’re going to be as long as I needed mine to be. And I may be alone in this, but I do. not. like. “chunky” floating shelves. For me, certain things are meant to be chunky—like a baby’s legs and cookie dough ice cream. And some things just aren’t—like peanut butter, Leonardo DiCaprio (sorry #dadbod fans), and my floating shelves.
I get that it’s a combination of personal taste and function. A certain thickness is to be understood for the sake of getting a long, wide shelf to be sturdy enough to last with a reasonable amount of weight on it (and without bowing in the middle over time). The inner structure has to bear the weight, and shelf thickness is often just a byproduct of that. Or some people just like them that way, and that’s good too. But considering that my laundry room space is really, really tight (and awkwardly shaped), I simply didn’t like the idea of thick, chunky shelves taking up the view. What wasn’t so simple is figuring out how to make something thin support a lot of weight…like chicken legs on bodybuilder. So, I worked on the idea for a bit and combined tutorial ideas that I spied on Pinterest until I came up with something that worked for me. And a lot better than the whole bodybuilder thing.
So let’s get on with the tutorial, shall we? (Note: some links contain affiliates.)
Lumber:
- 1x2s (frame & front shelf piece)
- 1x3s or similar 1x scrap wood (frame)
- 1/2″ sanded plywood (for the top of each shelf)
- 5mm sanded plywood (for the bottom of each shelf; decorative purposes only)
Materials:
- Pocket hole screws (1 1/4″)
- Wood glue
- Finishing nails (1 and 2 1/2″)
- Wood putty
- Caulk
- Paint
- Pencil
- Painter’s tape
- Paint/stain
Tools:
- Kreg Jig
- Circular saw or table saw
- Miter saw
- Nail gun & air compressor or cordless nail gun
- Level
- Stud finder
- Square
- Utility knife (mine was provided to me by the folks at Olfa, but I seriously LOVE this thing)*
- Clamps
For drilling into tile (see this post for the full tutorial):
- 5/16″ ceramic/glass tile bit
- 5/8″ wall anchors (make sure you buy the kind for the correct materials/thickness of your wall!)
- hammer
- spray bottle of water
- & more
First things first
My shelves were surrounded on three sides by walls; the entire tutorial is pretty much contingent upon that fact alone, so if you are trying to secure these on a wall that isn’t at least surrounded on two sides with studs or a place to put anchors, you may have support issues.

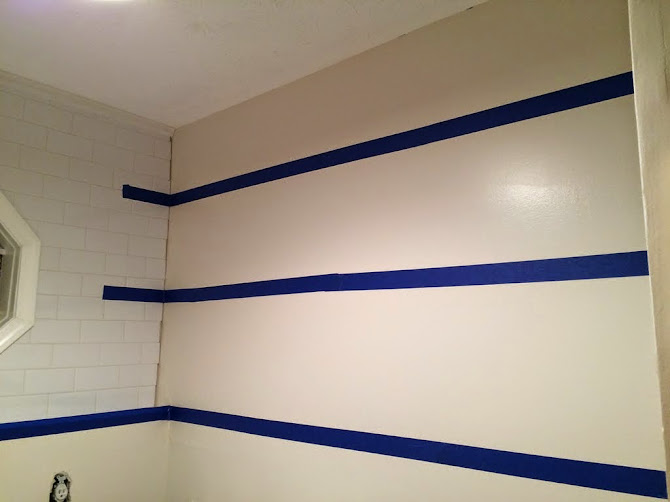
To begin, mark the spot for your shelves along the wall. Using painter’s tape will help you visualize each shelf for placement and spacing. Remove the tape, then use a level to mark a pencil line along the entire wall to use as your level edge for adding the support (basically, you’re going to match the straight edge of the top of your support with this line).
Shelf measurements
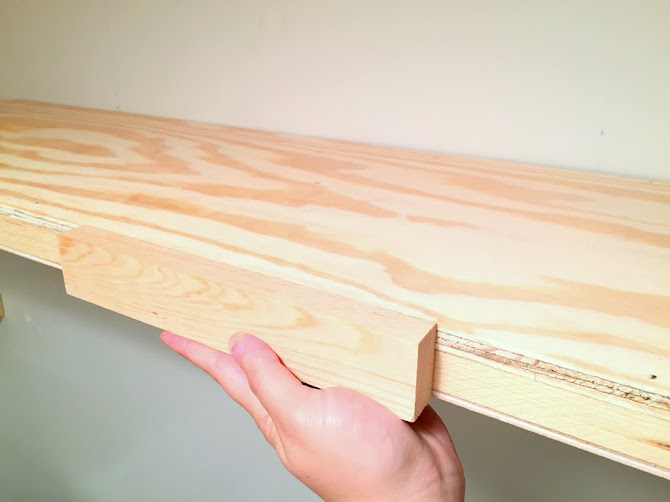
Each of my shelves (on the right side of the picture above) were approximately 69 inches long and 12 inches deep (I know, it sounds like the setup for a joke, but it’s true). The best part though is that the thickness of each shelf is only 1.5″, and still super sturdy!!!
By using a 1×2 on its thin side, I was able to keep the shelf thin but still provide a supporting structure. It’s also the reason why I created a full 4-sided frame rather than just installing the cleats and middle supports through the shelf; other floating shelf tutorials do not include the 4th piece in the front, which makes sense to me, but I found that it really came in handy for keeping the middle pieces secure, level, and ultimately supporting the plywood on top.
1. Create the frame
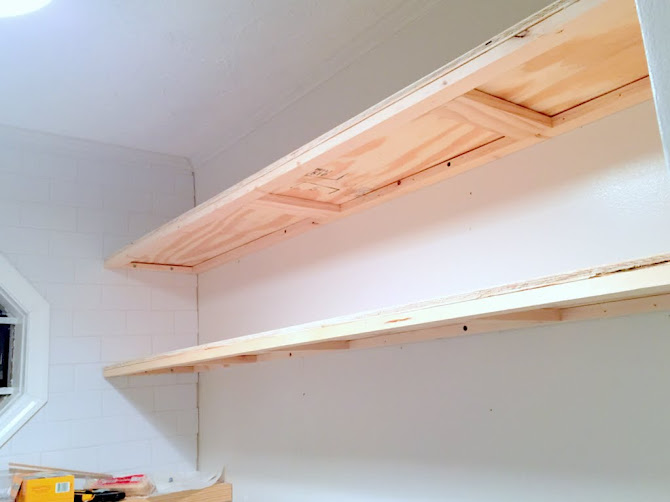
The frame is pretty easy to make; I used 1x2s for the sides of each shelf, cut to length for the back and front pieces (so 69″ or 5’9″ long) and width for the sides, minus the width of the front and back pieces (I wanted 12″ wide shelves, but the actual width of 1x2s are 1 1/2″ wide, so that meant only 9″ for the side pieces). I experimented a little with the inner pieces of each shelf though, first trying 1x2s on the lower shelf and some scrap pieces of 1x3s on the top shelf (so you’ll see some differences in each shelf’s structure in my pictures). I found the 1x3s to provide a much sturdier frame when using in combination with the Kreg Jig, so I’m recommending that you use this structure as well. I’m still very much a beginner with Google Sketchup (having done only one other post ages ago with it), so hopefully this makes sense!

And just because I’m new to SketchUp, I thought I’d give you a color-coded version as well. Blue and white are 1x2s (9″ and 69″ long, respectively) and the green is 1×3 (9″ long).

The holes for all of the Kreg’d pieces were done before installing on the wall, but I wound up taking the side cleats off for the next few steps before putting it back together (I still recommend doing this since it makes screwing things back together much easier).
About the side cleats
For beginners, you might not be familiar with the term “cleats” – but these are usually the pieces that screw into the wall and help support/distribute the weight. I’m also a DIYer who uses whatever convenient term that pops into my mind, so cleats, frame, supports, etc. all share a similar meaning for me in this project. Essentially, what I’m doing here is turning these cleats into more of a frame so that there are other parts that also help support weight, but it all relies on how securely these first few pieces are installed. You’ll want to make sure these are nice and secure by either screwing them into studs or using wall anchors on all three sides that attach to the walls. I first began by installing these pieces on each side—the tile wall first (since it would be the least forgiving), and then the opposite wall using wall anchors. Be sure to leave a gap along the back wall for the back piece of the frame to fit in snugly (1 1/2″).
Tip from Pretty Handy Girl: Use Cobra Triple-Grip anchors for a solid hold.
2. Installing support through a tile wall
This needed a tutorial of its own, so you can find that here.

3. Add the middle supports to the back cleat
With the longer pieces of each shelf cut to 69″ each, I used some remaining scrap 1x2s and 1x3s to fill in the middle section of the first shelf. I drilled pocket holes using my Kreg Jig and 1 1/4″ screws (determined based on the thickness of the wood, which is 3/4″). Use wood glue too (but only once you’re sure of how things will be installed; I had some trial and error figuring out each step, so I’m glad I waited to use wood glue!). As I mentioned above, I found after installing the first shelf that I liked the 1x3s for middle support better, so I recommend using them as you can see in the diagrams above.
Tip: Face clamps are your best friend; if you have a Kreg Jig, I highly recommend using their face clamp for projects!
I wound up not having enough scrap 1×3 laying around for both shelves, but I found that even with only 2 supports in the middle (I eyeballed the spacing), it was still very solid.
4. Add the frame to the wall
With the side cleats installed (remember to leave a gap to fit the back piece), screw in the back cleat and rest of the frame to studs in the wall. The front piece can either be screwed into the middle supports already or put on last; I wound up trying both ways and didn’t find that there was a significant difference (either way, the whole thing was still somewhat cumbersome to install by myself because of the length).

Tip: A brad nailer is a great substitute for a helping hand; it allows you to temporarily tack up the shelf support and get things level before screwing everything into the studs.
5. Add plywood
With the frame in place, you can then add plywood. Since I don’t have a table saw in my garage right now, I had my local Blue cut down a piece of 1/2″ sanded plywood and 5mm sanded plywood to 12″ lengths for me. The rest of the cuts I did at home using my circular saw and a piece of scrap wood clamped to the plywood to use as a guide.

Tip: Use painter’s tape to help keep a clean edge when cutting plywood.

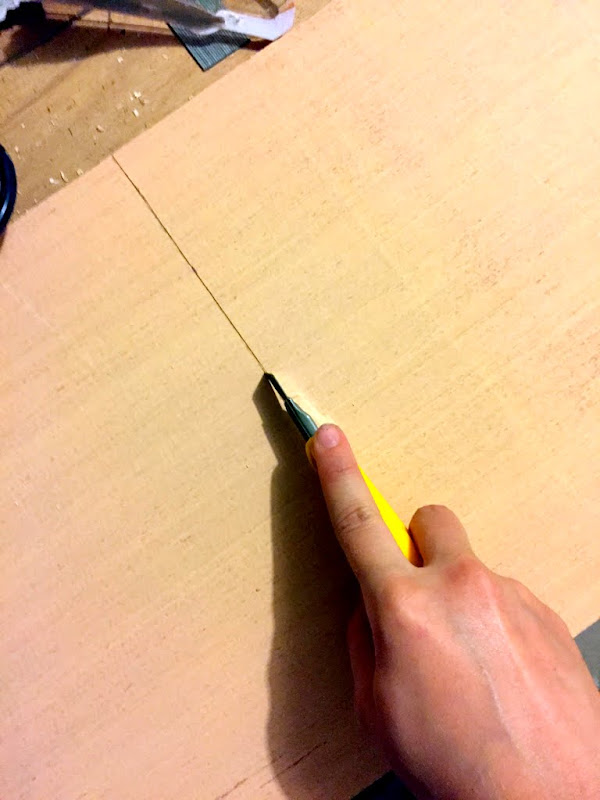
For the underside piece of plywood (the thin 5mm stuff), I was able to cut it down with a utility knife quite easily (sidenote: Olfa** sent me several of their utility knives to try out this summer, and I’ve found that I prefer this utility knife to the rest. It’s my new go-to tool—great for small molding projects, and I’ve found that it’s been the leading reason why there are no more cardboard boxes in this house anymore*).
I attached the top piece of plywood with wood glue and my brad nailer. The bottom piece needed some clamping before it stayed up, so I used a few brad nails strategically to hold things in place toward the back and clamped the front while the glue dried.
6. Attach the front piece
When all pieces are attached, they wound up being just shy of 1 1/2″ thick, so I was able to use another 1×2 for the front to hide the plywood edges.
7. Finish and decorate!
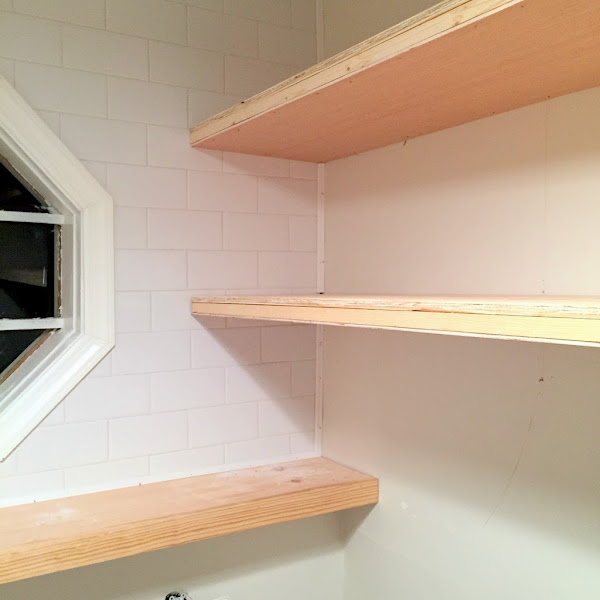
After all of the finishing steps (filling holes with wood filler, sanding, caulking, priming, painting, etc.), here’s how things look now:
You can also see two other updates in these pictures: one, I added the rest of the trim around the tile to complete the back wall too (which looks a LOT better than before!); and two, I have begun RE-painting the walls. That makes this the third color I’ve put on them since moving in, and worth a serious eyeroll for taking so many tries to find what works, but I’ve known for a while that the color I’ve been using in the rest of the house simply wasn’t working with the lighting in this room. I tried to hold out as long as possible to see if I could live with it. But once I started painting the shelves, I figured now was the time to see if a leftover gallon of white paint I had from my office would fit—and it did! I’m now convinced that my search for the right color in this room is over. I’ll have more on that when it’s all finished.

And for those wondering, the baskets I’ve added to the room are from Ikea and are VERY old, but they seem to work well in here. The white container on the right is an old kitchen container from Goodwill that I snagged last weeked (maybe a cookie jar?). It now holds my ugly detergent pods, which are nice to have hidden.

Looks like I may need to paint the ceiling, too.
So, that’s it for now. I still have to do some trim work, paint things, and have a decorative project in the works for this room, which I’m hoping to finish up later this evening. I’m loving the way it’s turning out, so it may be the right project to work on while the forecast is predicting rain for the week. More on that soon, and you can catch sneak peeks on Instagram if interested.

———————————————
*I have honestly been addicted to cutting up cardboard boxes lately because this knife cuts so well. Is that weird? That’s weird, I bet. But it’s also strangely satisfying, and my garden bed needed a lot of cardboard to help kill off the grass before laying down mulch, so this odd little obsession worked out great (it’s still mostly just the pure fun of cutting through each box like a tiny samurai sword, though).
**Full disclosure: As I mentioned above, Olfa sent me a package of products to try out and asked me to share those thoughts on the blog once I’d tried them. But, as always, all thoughts and opinions expressed on this blog are 100% my own, and I never share something unless I really do like it.
The post How to Create Long, Deep, & Thin Floating Shelves appeared first on The Ugly Duckling House.
Website // Subscribe // Advertise // Twitter // Facebook // Google+


No comments:
Post a Comment